

Last Updated on October 20, 2023
Are you thinking of sharing a SharePoint site externally?
Certainly, that’s possible. But you must know that it also poses some risks on your site, and you have to enable the feature on the admin center.
In this article, I’ll talk about how external sharing works, how to enable it, and how to actually invite a guest to your site.
Let’s get started.
Table of Contents:
When you share a site externally, you basically share all the files, folders, documents, libraries, and lists within that site (as long as they’re publicly available on the site).
In SharePoint, you can control it at different levels:
- Tenant-wide
- Site-level
In the event that both levels have different sharing levels, the most restrive one will prevail — all of the site’s protection.
There are four sharing levels available (from the most permissive to the least permissive):
- Anyone: Users can share files and folders using links that don’t require sign-in.
- New and existing guests: Guests must sign in or provide a verification code.
- Existing guests: Only guests already in your organization’s directory.
- Only people in your organization: No external sharing allowed.
In addition, there are additional settings you can set up when you do it tenant-wide:
- Limit external sharing by domain: You will be able to add domains in an allowed and blocked list for external sharing. On the other hand, this option will not function when users share files/folders with “Anyone” links.
- Allow only users in specific security groups to share externally: No other users can share a site externally other than the ones you specified in this setting.
- Guests might sign in using the same account to which sharing invitations are sent: If this option isn’t enabled, invited guests will be able to access the invitation to the site with any of their accounts. Whether or not this option is enabled, the invitation will always expire after someone redeems it once.
- Allow guests to share items they don’t own: When enabled, guests will be able to share the contents in the site externally, which might pose a security threat.
- Guest access to a site or OneDrive will expire automatically after a specified number of days: When enabled, the guest’s access to the site will be revoked after a number of days that you can specify.
- People who use a verification code must reauthenticate after a specified number of days: When enabled, the user will need to reauthenticate and check whether the site is still shared externally.
Note: By the way, external sharing in SharePoint is often compared to Azure AD B2B Collaboration. Check out my article that talks more about it.
If you share a site externally, then you give the guest access to all publicly available files and folders.
On the other hand, files/folders external sharing will only give the guests access to those specific files or folders on your site.
File/folder external sharing uses links to generate the content for an external guest. You can share the file/folder through:
- Email: The guest has to validate his or her identity through an 8-digital passcode
- Anonymously: The guest can directly click a link to access the shared file/folder without the need to verify his or her identity
When you share a site externally, it’s more secure since the guest has to prove their identity through a Microsoft ID or email address.
Guests who accepted the invitation to a site will end up with their names in the user directory, so the admin can clearly identify them as guests.
Site External Sharing vs Group External Sharing
Many of the sites in SharePoint, including some of your sites, are not only standalone sites. Many of them have accompanying groups.
The main difference between site external sharing and group external sharing is this:
When you share a site externally, you’re only giving access to the site itself. When you share a group, you also share various assets like sites, calendars, teams, etc.
In short, when you share a group externally, you’re inviting someone not only to your site — but to the Microsoft 365 assets connected to that group.
On the other hand, that guest will not have access to everything the group has since he will not be allowed to the Group Outlook calendar and Group Outlook Conversations.
Note: If you want to know more about the different types of sites you can create in SharePoint, check out this article where I discuss this topic in detail.
Sign up for exclusive updates, tips, and strategies
As I have written earlier, there are two levels where you can enable external sharing, both of which have to be in the SharePoint admin center.
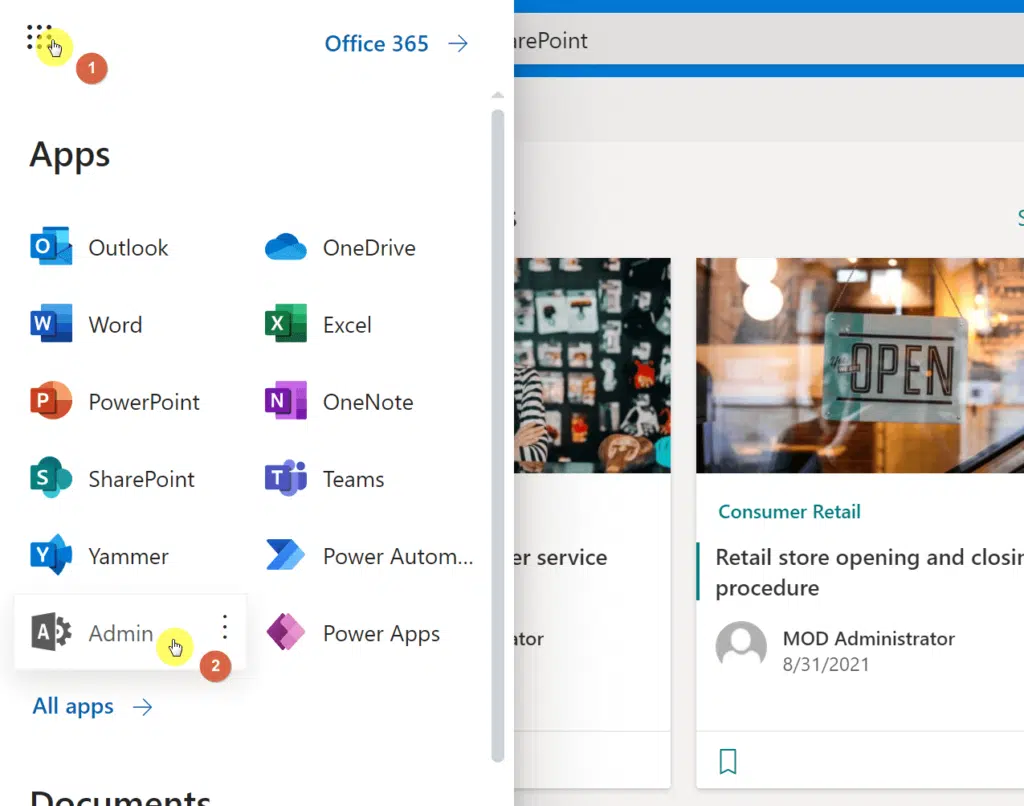
Go to any of your sites in the tenant. Click on the app launcher icon on the upper left corner and then on the “Admin” button.
Then, expand the Admin centers option in the left panel and click on the “SharePoint” button.

Tenant-wide
Doing this will enable all the sites in your tenant to be shared with external guests.
In the SharePoint admin center, expand the “Policies” option and click on the “Sharing” button.

On the next page, turn both SharePoint and OneDrive slider up to either “Anyone” or “New and existing guests” options, the latter the more secure.
Related: Guide: How to Share Files on OneDrive With External Users
If you want, expand the “More external sharing settings” to see more settings.

Once you’re done, make sure to scroll down and click on the “Save” button.
Site-wide
If you want to enable the external sharing feature on one site only, then you must go to the “Active sites” page in the admin center.

Once here, select the target side and click “Sharing” on the command bar.

A “Sharing” panel will slide in from the right. On the “External sharing” options, select either “Anyone” or “New and existing guests” and click on the “Save” button.

Once the site has been updated, you can then go ahead and actually share it with external guests.
Using PowerShell
It’s also possible to use PowerShell in enabling the external sharing feature — both at the tenant level and at the site level.
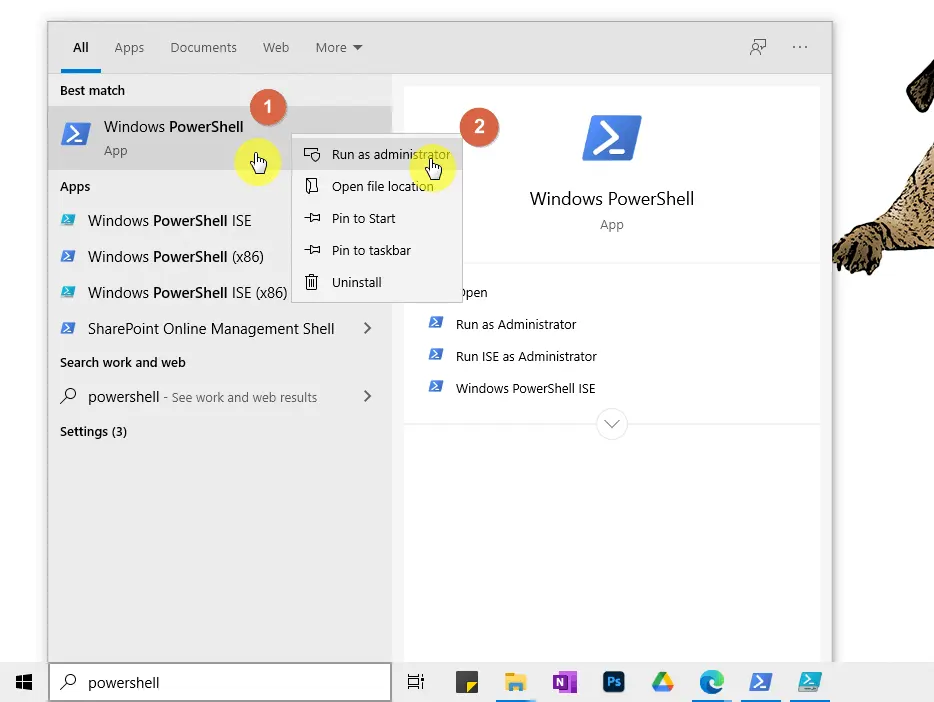
However, make sure to run Windows PowerShell in admin mode:
Then, all you need to do is copy and paste the codes (credits to the Office 365 Reports) to the PowerShell terminal.
For enabling it at the tenant level, you need to use the following code (make sure to replace “tenant” with your own):
Connect-SPOService -url https://tenant-admin.sharepoint.com/Here are permission level codes to use:
- ExternalUserAndGuestSharing – Anyone
- ExternalUserSharingOnly – New and Existing guests
- ExistingExternalUserSharingOnly – Existing guests
- Disabled – Only people in your organization
Now, paste in the code below and enter a permission level.
Set-SPOTenant -SharingCapability PermissionLevelFor example, since we’re sharing the site externally, we can set it to “Anyone” through the following:
Set-SPOTenant -SharingCapability ExternalUserAndGuestSharing
For the site level, you can use the same permission level codes included in the following snippet (replace “SiteLink” and “PermissionLevel”):
Set-SPOSite -Identity <SiteLink> -SharingCapability PermissionLevelTo share your SharePoint site with other people, go to the target site first.
Then, click on the gear icon in the upper-right corner and then on the “Site permissions” option.
Now, there is a slight difference when sharing a site with an associated group (team sites) and standalone sites.
Sharing a team site with a group externally
If you share a team site with a group, then click on the “Add members” button first and select “Share site only”.

Then, enter the email address of the guest to the form provided and click on the suggested email address.

After that, make sure the guest only has a “Read” permission level to prevent any unauthorized edits. Once you’re done, click on the “Add” button.

Sharing a standalone site externally
Sharing a standalone site is a lot simpler — mainly because it has no other assets besides the site itself.
On the “Permissions” panel, click on the “Share site” button.

Enter the guest’s email address on the form and click on the suggested email address.

Similarly, make sure the guest has a read permission level only before you click on the “Add” button below.

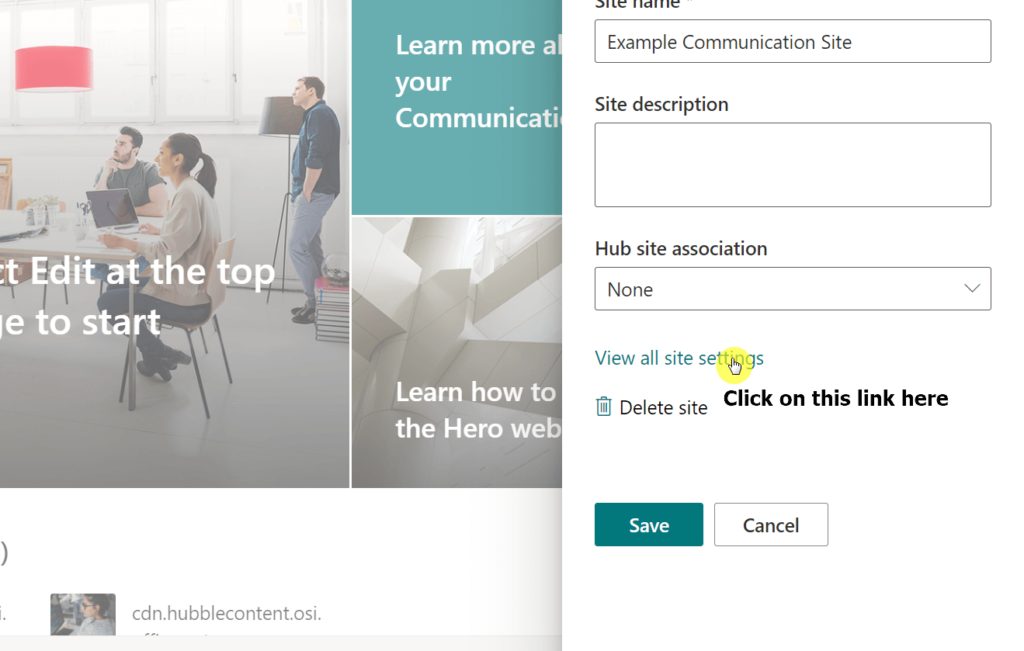
Now, if you want to check the status of your invitations, go to the “Site information” option on your site.
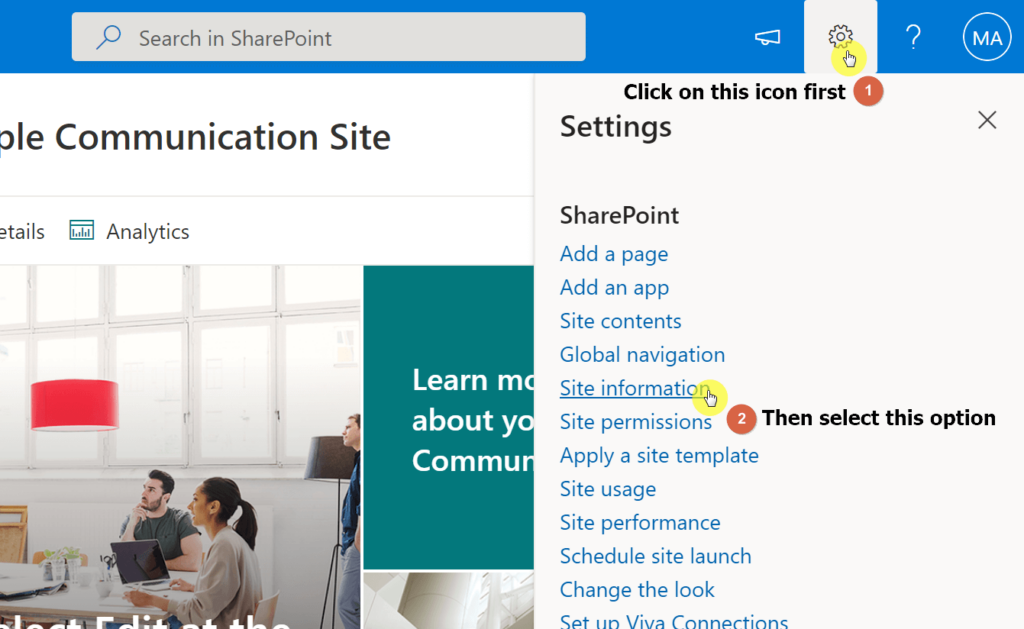
Then, click on the “View all site settings” link at the bottom.
On the “Site Settings” page, you will see a link that says “Access requests and invitations” under “Users and Permissions”.
Click that link.

On the next page, you will see all the invitations you sent, when they were requested, and what’s the status of the invitation.

Best Practices to Follow When Sharing Externally
Like I wrote earlier, sharing your SharePoint site externally poses some threat to your site’s security and confidentiality.
However, there are some ways to mitigate that:
1. Only enable external sharing when you have to
This goes without saying but, you must keep the external sharing disabled until the time you need to use it to invite someone outside your organization.
With this, you will limit the risks to your site especially when you select the option to share it with anyone (the most permissive option).
In addition, once you’re done sharing your site externally, turn it off again. You can always enable it anytime you need to so there’s no use keeping it open.
2. Enable “Guests might sign in using the same account to which sharing invitations are sent”
When you invite a guest to the site, that person will be able to sign in using any credentials as long as that person redeems the invitation.
However, if you enable this option, the guest must sign in with the account to where you sent the invitation.
This will restrict the guest to using only the account with the email address where you sent the invitation, although the invitation will expire after it has been redeemed once.
But this method is more secure and will make sure only that person can redeem the invitation you sent.
Related: How to Secure OneDrive: Personal Vault Walkthrough Tutorial
3. Teach your users about governance policies
No matter how vigilant you are over your site’s security, it will matter less if your users don’t value security as much as you do.
On the other hand, there is a way to restrict who will be able to share the site externally (and you can be picky about it).
However, this is often overlooked, which is why you must take the time to teach your users about governance policies, especially when sharing externally.
Note: If you’re concerned about SharePoint security, I wrote an updated guide about it along with the best practices to follow in 2022.
External Sharing Experience for the Guest
So what happens after you send the invitation to the guest?
First, that guest will receive the following email at the email address you entered on the form.

When the guest clicks on the link to the site, that person will see the following page:

If the user has a Microsoft account, he or she can use that to sign in to the site.
However, this will not apply if you enabled the “Guests might sign in using the same account to which sharing invitations are sent” option.
In the event that the user has no Microsoft account and you didn’t enable the option mentioned earlier, that person can readily create an account.
Now, once the guest successfully logs in to the site, the status of the invitation, as seen on the “Site Setting” page, will now show “Accepted by”.
It’s not unusual for an organization to invite an external user to the site. More often, you need to invite contractors and specialists to the team.
The steps I outlined in this article will allow you to enable the external sharing tenant-wide or at the site level and actually share a site with external guests.
But make sure to follow the best practices I advised when doing so:
- Only enable external sharing when you have to
- Enable “Guests might sign in using the same account to which sharing invitations are sent”
- Teach your users about governance policies
Now, do you have some questions regarding external sharing in SharePoint Online? If you do, kindly leave them in the comment section below.
For inquiries and concerns, please use the site contact form and I’ll reach back to you as soon as possible.


Can you describe how to extend access for external users whose access is expiring soon but still need access?
on “sign in using the same account to which the invite was sent,” it’s not clear whether, in the answer, they can use any *Microsoft* account/ID, or any account (can’t imagine it’s the latter, but would be good to spell out; thanks).