

Last Updated on August 26, 2023
In one of my earlier articles, I broke down the differences between Microsoft Office 365 and GoDaddy Office 365.
I also recommended that if anyone wanted to use Microsoft 365, it’s better to purchase directly from the source, even if it may seem more expensive.
If you’re one of those who purchased a Microsoft 365 subscription from Godaddy and you decided to migrate now, you may have noticed that things seem a bit hairy.
That’s why in this article, I want to talk about how to migrate from GoDaddy to Microsoft 365 in the easiest way possible.
Let’s get started.
Table of Contents:
Why migrate to Microsoft 365 from GoDaddy?
GoDaddy is a good domain registrar. Upon purchase, they also upsell a Microsoft 365 subscription through them.
Unfortunately, this federates the domain and the tenant, which makes it hard to transfer to any other cloud service provider.
This is besides the nuances and problems with GoDaddy’s Microsoft 365 subscription. If you want to read more about it, check out this article.
Back to the migration — moving out from GoDaddy may require you to talk with GoDaddy’s support team (and may take hours to become successful).
Furthermore, if they have to perform the defederation themselves, they will delete all the data and user accounts associated.
For this reason, you may want to do the migration yourself. It’s not a walk in the park, but it will certainly save you some time.
In this guide, I divided the steps into three parts — pre-migration, migration, and post-migration.
Related: How to Use the Microsoft SharePoint Migration Tool
Sign up for exclusive updates, tips, and strategies
Phase 1: Pre-migration steps
Step 1: Prepare your Microsoft 365 tenant
Since you’re migrating, I assume you already have a tenant on Microsoft 365.
Log in to the Microsoft Office Home Portal and navigate to the admin center. Make sure the account you’re using is a global admin.
If you’re not sure how to get to the admin center, then simply find the admin logo from the left-hand panel menu and click on it.

Then, create user accounts with similar usernames. Make sure to use the tenantname.onmicrosoft.com on the address.

Adding a user requires you to assign a license to the new user. If you don’t have one, there’s a link you can click on the form where you add a new user.

Note: Keep in mind that all users included in the migration must have a license. This includes the global admin user.
Step 2: Prepare a tenant admin account in GoDaddy
When you first set up Microsoft 365 with GoDaddy, the first user created is set as an admin (though the admin still goes to the GoDaddy portal when visiting the admin center).
When defederating GoDaddy, you need to have access to the true admin you can use to run PowerShell scripts.
First off, go to the Azure Active Directory Portal and log in with the credentials of the first user created.
Then, click on the “Azure Active Directory” button to access the service.

Once you’re inside Azure Active Directory, click on the “Users” link under the “Manage” group on the left-hand menu panel.

On the list of users, find the one with the user principal name “”.
Note: If for some reason you can already access this user, there is no need to proceed any further. Skip directly to the next phase.
Click on that user and find the “Reset password” button.

The system will then give you a temporary password. Copy it into Notepad or somewhere safe along with the user principal name.
Then, start an incognito tab or use another browser and navigate to the Microsoft Office Home Portal and log in with the username and temporary password.
On the sign-in, set a new password, copy it, and save it into a Notepad or someplace secure (along with the username). You need it later on.
Step 3: Prepare the end-users
For the migration to become successful, you must be able to control the accounts of the end users.
To make this easier, you can use source-side impersonation (SSI) on both the target (Microsoft) and source (GoDaddy) tenants.
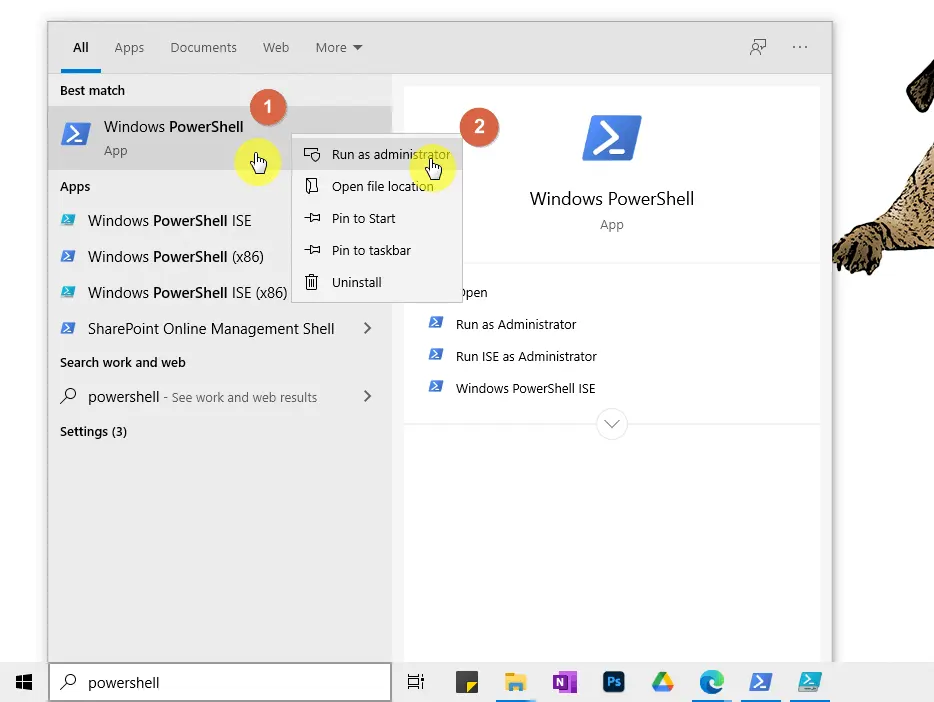
For the next step, you need to open Windows PowerShell in admin mode.
Simply search for it on your desktop, right-click, and select “Run as administrator”.
Starting with the target Microsoft 365 tenant, paste the code below to Windows PowerShell.
Don’t forget to change the user in the last line of the code.
Set-ExecutionPolicy Unrestricted
# Enter the global admin credential from the target tenant
$LiveCred = Get-Credential
$Session = New-PSSession -ConfigurationName Microsoft.Exchange -ConnectionUri https://ps.outlook.com/powershell/ -Credential $LiveCred -Authentication Basic -AllowRedirection
Import-PSSession
$Session Enable-OrganizationCustomization
# Change the user below with the target global admin account
New-ManagementRoleAssignment -Name "App Impersonation" -Role "ApplicationImpersonation" -User ""Close Windows PowerShell after this.
Now it’s time to enable the SSI feature on GoDaddy.
Once again, paste the code below, and this time, use the global admin credentials from step 2 (the one where you reset the password).
Set-ExecutionPolicy Unrestricted
# Enter the global admin credential from the target tenant
$LiveCred = Get-Credential
$Session = New-PSSession -ConfigurationName Microsoft.Exchange -ConnectionUri https://ps.outlook.com/powershell/ -Credential $LiveCred -Authentication Basic -AllowRedirection
Import-PSSession
$Session Enable-OrganizationCustomization
# Change the user below with the source global admin account
New-ManagementRoleAssignment -Name "App Impersonation" -Role "ApplicationImpersonation" -User ""Close the Windows PowerShell after this.
It’s possible that the users will see activation prompts on the apps as well as on Microsoft Outlook.
For this, you must prepare some sort of guide that will help them sign back to Microsoft apps after switching your cloud service provider.
Then, tell everyone the schedule of the migration. It’s better if you do this during off-time in case there are any downtimes during the process.
Phase 2: Migrate from GoDaddy to Microsoft 365
Step 4: Do a full migration with BitTitan
For a tenant-to-tenant migration, it’s best to use a tool or a solution like BitTitan (that’s if you want to do it yourself).
If you want to use BitTitan, simply follow these series of steps:
- Create a new Mailbox Project. Provide a name for the project and create a new customer.
- Enter an endpoint name, which can be the tenant name + source (GoDaddy). You also have to enter the credentials (the global admin access from step 2).
- Do the same for the target. Give it an endpoint name and enter the global admin username and password.
- Make sure to uncheck the option that enables tenant-to-tenant coexistence.
- After following all the steps above, save the project.
- Then, make use of the autodiscover feature and click on the “Start Autodiscover” button.
- Check the discovered mailboxes. Ensure that all mailboxes that must be migrated are shown.
- Remember the usernames/emails you created on step 1? Make sure that the target emails are the same. If not, edit them.
- Verify the validity of at least two mailboxes. Click on the “Start” button and select the “Verify Credentials” option.
- Once you’re ready, select all mailboxes and do a full migration. You will see a “Full Migration” option after clicking on the “Start” button
- The migration process itself can take days depending on the number of files. Wait for it to finish before you proceed to the next step.
Step 5: Change the main SMTP for each user
For this next step, you need to run Windows PowerShell again as an administrator. Then run the following commands:
Install-Module MSOnline
Import-module MSonline
# Use the new global admin credentials
Connect-MsolService
# Use your domain name
Get-MsolUser -DomainName "domain.com" | Select UserPrincipalname
# Select a username from the list above and use it below
Set-MsolUserPrincipalName -UserPrincipalName "" -NewUserPrincipalName ""What the code above does is change the main SMTP of all users to NETORG.
Step 6: Remove federation with GoDaddy
For the next step, you need to open Windows PowerShell in admin mode.
Then, copy and paste the code below directly to the PowerShell:
Write-Host "Checking for MSOnline module..."

$Module = Get-Module -Name "MSOnline" -ListAvailable

if ($Module -eq $null) {

        Write-Host "MSOnline module not found, installing MSOnline"
        Install-Module -name MSOnline

    }
Connect-Msolservice
#Provide the admin credentials from step 2 of this article

Get-MsolDomain
#Check that the domain is federated

Set-MsolDomainAuthentication -DomainName "" -Authentication ManagedNote: If you encountered the error that says something about requiring administrator rights (as shown in the screenshot below), it means you didn’t open Windows PowerShell in admin mode.

When this is successful, you will be able to use the command line again.
If you run the Get-MsolDomain command again, you will see now that the domain is “managed”.
After this, you can also remove the domain from GoDaddy Microsoft 365 by simply entering the command below:
Remove-MsolDomain -DomainName "domain.com" -ForceDon’t forget to replace “domain.com” with your own domain name.
Step 7: Update the DNS records on the new Microsoft 365 tenant
For this process, you need to go back to the Microsoft Admin Center.
Once you’re inside, click on the “Setup” button from the left-hand menu panel.
Then, find the “Get your custom domain set up” link and click on it.

The next steps are straightforward:
- Enter the domain.
- When asked how to verify the domain page, select “Add a TXT record”.
- On a new incognito tab or browser, find your DNS records on GoDaddy and add the TXT record.
- Wait for a few minutes and go back to the admin center page and click on the “Verify” button.
- When asked about updating the DNS settings, click on the “I’ll add the DNS records myself” option.
- Update the DNS records and delete any email server references to GoDaddy.
- Once you’re done, find the refresh button until you see a message about the DNS records being correct.
Step 8: Set the primary email addresses to the new vanity domain
In this next step, you need to update the primary email addresses on Microsoft 365 to match with the new vanity domain name.
Go back to Microsoft 365 Admin Center and go to the “Active users” page.

Click on a user’s name and click the “Manage username and email” link.

Add a new alias for the user with the new vanity domain. Then, click “Set as primary”.
In case a yellow warning box shows, simply click on the “Save” button and close the box.
Do this step for all the users in the tenant.
Note: If you encounter a red warning box instead that says about waiting for hours, you need to open Windows PowerShell again in admin mode and run the code below.
Import-module msonline
Connect-MsolService
Get-MsolDomain
Set-MsolUserPrincipalName -UserPrincipalName "" -NewUserPrincipalName ""Don’t forget to update the primary email addresses on shared mailboxes to the new vanity domain.
Step 9: Do a final sync using BitTitan
In this step, you need to do a final sync using BitTitan to ensure that all the emails are captured.
Simply follow these steps:
- Revisit the project you created after you added the domain to Microsoft 365.
- On the source admin username and password, change the source to the admin account on netorgXXX.onmicrosoft.com.
- Do a full sync on a small mailbox to see if there are no credential issues.
- If the test full sync works, do a full sync on all the mailboxes.
- If the test full sync failed, check the password for the source admin.
Phase 3: Post-migration steps
After following the previous steps, you can now relax a little as you’re now done with the hardest part.
Step 10: Reset the password of the users
This part is easy. If there are few users, you can do this manually with every user.
Log in to the Microsoft Office Home Portal with the admin credentials from step 2.
Go to the “Users” page and reset each user’s password.
Don’t forget to take note of the temporary password for each user.
Then, make sure that users can reset their own passwords. Simply visit the Azure Active Directory (see step #2).
Within the Azure Active Directory Service page, find the “Password reset” button on the left-hand menu panel and click on it.

Make sure the “All” option is selected on the “Self-service password reset”.

Don’t forget to click “Save” after making the changes.
Step 11: Finishing touches
In the final bits, you must reset your own password as well. You can do this from the Microsoft Office Home Portal.
Once you do this, you will now be able to access the email anywhere as long as you have Microsoft Outlook.
It’s also time to log off your GoDaddy credentials from Microsoft Office applications. Simply sign out and log in with your new credentials.
Don’t forget to update the apps as well to the latest version.
Migrating to Microsoft 365 from GoDaddy
That’s it! You can now breathe if you got to this part as you now have successfully migrated to Microsoft 365.
Admittedly, this is hard to do for those who are new in the industry. Certainly, if you don’t understand anything past the second step, it’s better if you don’t attempt this.
Unfortunately, making a mistake in this process can be costly. This can cause downtimes and potential loss of data.
If you have any questions regarding the migration process, drop them down in the comment section below.
For inquiries or concerns, please message me directly through my contact form and I’ll get back to you as soon as possible.


This is a great article to see out there. I had to figure this out on my own – reading this would have saved me a ton of time. I have found on the couple times that I have done it, that it was fairly quick to have GoDaddy do the domain removal once I was sure that everything I needed was off of there, and I was able to add it in to the new tenant pretty quickly – for smaller organizations, that is a feasible way to limit some of the Powershell stuff.
I am running into an issue where even though the tenant has moved Outlook does not want to open the accounts under the new tenant if a previous account with the same address was on the machine. We get a message that the connection to Exchange fails. I tried removing the previous account first but Outlook still will not work until days later. If I try a different email account under the new tenant Outlook applies the account instantly but if I try to replace with the previous user the connection to Exchange fails again. Microsoft support was able to… Read more »
Hi Jaimy,
I have run into this issue before too. What I did to solve it was temporarily change the User Principal Name (UPN) of the affected user and then used that to connect to Outlook. Once everything was connected, I changed the UPN back to its original, which does not require the user to log in again via Outlook. I believe there is a registry key somewhere that makes this problematic for the use case you mentioned but I could not figure out where the key exists so that’s how I got to the above workaround.
Why go through all this work to do a migration instead of just defederating, assigning new licenses from CSP and then call it a day after removing GoDaddy as a Parner? A few security defaults are different on O365 out of the gate vs GoDaddy and the aesthetic .onmicrosoft.com domain will stick, but otherwise seems like defederate and done.
This is possible but there are still some potential limitations that should be considered. I’ll add this to my list of topics to write about next.
I wrote an article on this. How to Defederate Domain From Godaddy 365: Step-By-Step.
All of the Microsoft and Azure portals redirect to GoDaddy’s SSO page now. Any updated way to do this if you can’t get to the Microsoft tenant directly?
hey! thanks for the guide. is this strictly to transfer over emails? or will this also transfer power automate flows? I have a ton of power automate processes that I am not trying to rebuild after a migration…
Hey Cameron – This guide does not discuss migrating Power Platform customizations. There is a new tool that can help with this. Once I find the URL, I’ll add it under this comment.
The Microsoft Azure portal now redirects to GoDaddy’s SSO page. Is there any way to do this without GoDaddy involved at this time? I’ve got a client who purchased their domain and M365 accounts through GoDaddy and I need to migrate them away from GoDaddy to be able to manage their accounts as a CSP directly within the Microsoft tenant. Any help would be so greatly appreciated!
Can you please let me know how can i migrate 4 TB data from godaddy onedrive to new onedrive account.
You will need to use a migration tool. Sharegate is a great option.